Can People Do Multiple Coats of Powder Coat? A Complete Guide to Multi-Layer Spraying Process, Best Practices, and When You Need It
Yes, You Can Apply Multiple Coats of Powder Coating — And Why It Matters
The short answer is yes. Powder coating can absolutely be applied in multiple layers, and in many industrial applications, multi-layer coating is not just possible—it's the standard practice.
However, there's a critical distinction that many operators miss: the success of multi-layer powder coating depends far less on "can we spray again?" and far more on "are we handling what happens between layers correctly?"
I've worked with hundreds of manufacturers across cabinet production, aluminum extrusion, outdoor furniture, and metal fabrication. What I've consistently observed is that multi-layer coating failures don't happen because the powder itself is incompatible with recoating. They happen because of what gets skipped, rushed, or misunderstood between coats.
The real value of multi-layer coating isn't just thicker film. It's controlled film thickness, predictable adhesion, superior surface appearance, and long-term durability that single heavy coats often struggle to deliver reliably.
Key Advantages of Multi-Layer Powder Coating Over Single Heavy Coats
Better Film Thickness Control and Consistency
When you try to achieve high film thickness in one pass, you're fighting physics. Excessive powder accumulation in a single application leads to:
- Uneven charge distribution on the workpiece
- Powder bridging and clustering
- Sagging and flow issues during cure
- Orange peel texture and surface imperfection
With multi-layer application, each layer stays within the optimal spray window—typically 50–150 microns per pass, depending on your powder type and spray parameters. This means:
- Predictable powder flow and adhesion at each stage
- Better surface leveling as thinner layers flow more uniformly
- More consistent film thickness across complex geometries
- Reduced risk of defects that only appear after final cure
From my facility experience, I've seen products go from 70% first-pass quality to 95%+ when transitioning from single heavy coats to properly executed two or three-layer approaches.
Improved Adhesion Between Layers
This is where multi-layer coating shines. Each layer sits on a cured base that you've had the chance to inspect and prepare.
When you coat fresh onto cured powder:
- The surface is clean and oxidation-free (if you've cooled and stored properly)
- You can lightly sand or grit-blast the first layer to mechanically key the second coat
- You remove any dust, loose powder, or contamination before recoating
- The cured surface provides a stable substrate—no wet-paint inconsistencies
Compare this to a wet-on-wet single coat application where powder needs to bond to itself in a developing field. The layer-to-layer adhesion you achieve with multi-coat work is simply more reliable.
Superior Surface Appearance and Defect Prevention
High-gloss, smooth, defect-free surfaces are much easier to achieve with thinner coats stacked sequentially.
Why? Each thin layer:
- Flows out more completely and uniformly
- Has fewer surface tension and stress concentration points
- Cures with more predictable gloss and texture development
- Leaves room for micro-corrections (light surface treatment) before the next layer
Single thick coats often show:
- Orange peel (inconsistent surface texture)
- Cratering and curing stress marks
- Uneven gloss
- Sagging at edges and thin sections
With multi-layer work, you distribute the film build and give each layer time and condition to establish proper surface properties. The final finish is noticeably smoother and more consistent.
Enhanced Corrosion Resistance and Durability
Thicker films alone don't guarantee better corrosion resistance. Adhesion, pore-free coverage, and defect-free films do.
Multi-layer coating, when done correctly, delivers:
- Fewer pinholes and microcracks that expose substrate
- Better mechanical keying between layers
- More uniform film density across all layers
- Less stress buildup that can lead to early cracking and failure
In salt-spray testing (ASTM B117), a properly applied 200-micron multi-layer coat typically outperforms a hastily applied single 200-micron coat. We've seen this in projects for coastal furniture and marine-grade cabinetry where layer-to-layer adhesion becomes the limiting factor in 5+ year durability.
| Comparison Metric | Single Heavy Coat | Multi-Layer Coating |
|---|---|---|
| Film thickness control | ±30–50 microns variance | ±10–15 microns per layer |
| Surface defects (pinholes, orange peel) | Higher frequency | Lower frequency |
| Adhesion uniformity | Variable | More consistent |
| Edge buildup issues | Common | Reduced with proper technique |
| Defect-free rate (%) | 60–75% | 85–95% |
| Corrosion resistance (salt-spray hours) | 500–800 hrs | 800–1200+ hrs |

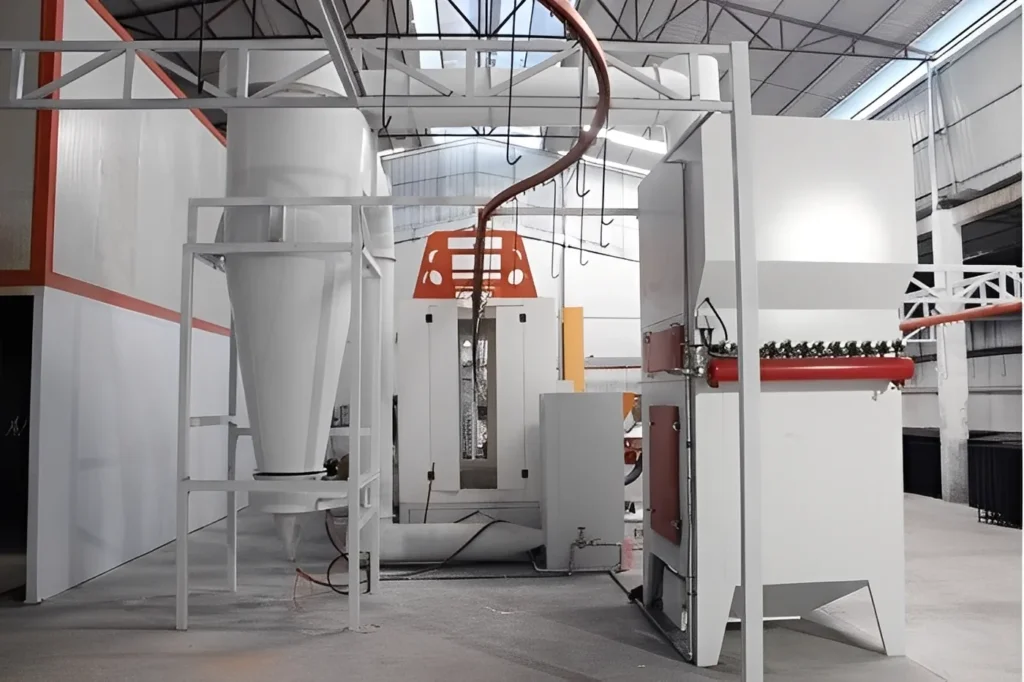
Step-by-Step Multi-Layer Powder Coating Process: What You Need to Do Between Each Layer
Pre-Coating Preparation (Foundation for All Layers)
Before any spray gun fires, the workpiece must be properly prepared. This is non-negotiable and applies equally to first coat and subsequent coats.
Standard pre-treatment includes:
- Degreasing – Remove oils, cutting fluids, and fingerprints (alkaline wash or solvent degreasing)
- Rust removal – Acid wash, sandblasting, or grit blasting for steel
- Phosphating or conversion coating – Chemical layer that improves adhesion and corrosion resistance (for ferrous metals)
- Final rinse – Deionized or distilled water to remove salts and residues
- Drying – Complete water removal (typically in a 80–120°C oven for 10–20 minutes)
Critical checkpoint: The workpiece entering the spray booth must be bone-dry and free of any visible contamination. Residual moisture or dust is one of the top causes of first-layer adhesion failure, which cascades into poor multi-layer performance.
First Coat: Application and Initial Cooling
Spray the first coat using standard electrostatic parameters for your powder type and workpiece:
- Gun voltage: Typically 60–90 kV (adjust for workpiece geometry and powder charging characteristics)
- Spray distance: Usually 150–250 mm (8–10 inches), varying by gun type and workpiece complexity
- Application thickness: 50–100 microns (target dry film thickness per layer is typically 40–60 microns depending on powder spec)
After spraying:
- Allow brief cooling in ambient air – Let the powder-coated workpiece cool from handling temperature down toward room temperature (15–30 minutes in still air, depending on piece size and material thermal mass)
- Avoid rushing to the cure oven – Rushing the first coat into the oven before it's fully electrostatic-bonded to the substrate can trap gases and reduce interlayer adhesion later
- Inspect for obvious defects – Look for missed areas, heavy accumulation at edges, or powder bridging that would compromise the second layer's adhesion
Inter-Layer Surface Treatment (Cleaning, Light Sanding, Inspection)
This is where multi-layer coating separates from single-coat work. What you do between layers directly determines whether the second coat succeeds or fails.
Step 1: Complete cooling to room temperature
The first coat must be fully cooled before handling. If the surface is still warm or hot:
- The powder is still slightly soft and tacky
- Light abrasion will drag and tear the powder rather than cleanly scarify the surface
- Moisture or dust will embed into the powder instead of being wiped away
- You risk deforming the workpiece if it's still thermally unstable
Step 2: Visual inspection
Before any mechanical treatment, inspect the first coat for:
- Coverage completeness (any bare metal or light spots?)
- Surface defects (pinholes, cratering, dust particles?)
- Moisture condensation (if humidity is high, wait longer or move to a dry area)
- Sagging or thick accumulation (especially at lower edges or inside cavities)
If defects are obvious and localized, you have two options:
- Accept them and cover with the second coat (works for minor flaws)
- Abort and start over (if adhesion looks questionable or coverage is obviously incomplete)
Step 3: Light surface preparation
Choose the appropriate method based on powder hardness and your facility equipment:
(a) Light sanding or scuffing
- Use 220–400 grit sandpaper, Scotch-Brite pads, or light abrasive nylon brushes
- Goal: Remove gloss, break the surface tension, and provide mechanical key for the next layer
- Duration: 10–30 seconds per workpiece depending on size (enough to dull the surface, not enough to cut through to bare substrate)
- Effect: Increases surface area for adhesion and reduces risk of the second coat sitting on a slick, non-porous surface
(b) Grit blasting (if facility-equipped and workpiece allows)
- Very fine grit (150–220 micron equivalent)
- Light pressure and short dwell time
- Creates excellent mechanical key and removes any loose powder residue
- More aggressive than sanding, but more consistent for high-volume work
(c) Compressed air blow-off (minimum approach)
- Use dry, oil-free compressed air at 4–6 bar
- Blow off loose powder dust and any loose particles
- Does NOT substitute for mechanical surface preparation—air blow alone won't provide adhesion improvement
Step 4: Cleaning and moisture check
- Wipe or brush the surface to remove all dust and debris
- In high-humidity environments, use a lint-free cloth or compressed air to remove surface moisture
- If the workpiece was stored in a cool area, allow 15–30 minutes in a warm, dry room to equalize temperature and evaporate condensation
- Touch-check: The surface should feel dry to the touch, not tacky or damp
Subsequent Coats: Application Parameters and Adjustments
Once the first layer is cooled, inspected, and prepped, subsequent layers follow a similar spray sequence—but with potential parameter adjustments.
Why adjustments may be needed:
-
Reverse ionization risk increases – Because the surface now has a built-up powder layer (which acts as an insulator), the electrostatic field behaves differently. The substrate is further from the "origin" of the field, and repulsion forces can increase.
-
Surface conductivity changes – A cured powder coat is less conductive than bare metal. The grounding path may be less direct, requiring lower voltage to maintain stable charging without excessive repulsion or back-ionization.
-
Powder bridging potential increases – Thicker workpieces and accumulated coatings can create Faraday cage effects in cavities and complex geometries, making it harder for powder to reach interior surfaces.
Recommended parameter adjustments for the second and third coats:
| Parameter | First Coat (Baseline) | Second+ Coat | Reason |
|---|---|---|---|
| Gun voltage (kV) | 60–90 | 50–80 | Reduce to prevent reverse ionization and powder repulsion |
| Spray distance (mm) | 200–250 | 180–220 | Slightly closer to compensate for lower conductivity and ensure coverage |
| Powder feed rate | Baseline | Slight reduction (90–95% of baseline) | Prevent accumulation and maintain thickness control |
| Spray pattern width | Baseline | Can narrow slightly | Better directional control on non-conductive surface |
| Gun air pressure | Baseline | Slight reduction if applicable | Lower air promotes better adhesion to existing coating |
Real-world example from my experience:
A cabinet assembly was being sprayed with a 120-micron target total thickness (two 60-micron coats). On the first coat, standard parameters were: 85 kV, 220 mm distance, 100% powder feed. On the second coat, we reduced voltage to 70 kV, moved to 200 mm distance, and kept powder feed at 95%. The result: edge buildup dropped from 30% over-spec on first coat to within 5% on second coat, and adhesion (measured by cross-hatch adhesion test) improved to 5B (perfect).
Final Curing: Temperature, Time, and Cooling Protocol
After the final coat is sprayed, the workpiece enters the cure cycle. This is largely unchanged from single-coat curing except that you must account for total film thickness when setting soak time.
Standard thermosetting powder curing (most common):
- Target temperature (workpiece surface): 160–200°C, depending on powder formulation (consult powder supplier TDS)
- Soak time: 10–20 minutes at target temperature (thicker films may require longer; verify with powder supplier)
- Heating ramp: Allow adequate dwell time in the preheat zone so interior of thick workpieces reaches cure temperature (don't rush thick parts through the oven)
- Cool-down: Natural air cooling or forced-air cooling depending on facility (rapid cooling can lock in internal stress; slower cooling promotes better cross-link maturation)
Why multi-layer affects cure:
-
Thermal conductivity lag – A 200-micron coat takes longer to conduct heat to the substrate than a 100-micron coat. If you use the same oven timing for both, the thick coat may be under-cured at its base layers.
-
Cure reaction kinetics – Thicker films trap heat, creating a gradient from surface (hottest) to base (cooler). If the base never reaches true cure temperature, adhesion between layers and to substrate can fail.
-
Post-cure stress – Over-thick coatings cured too fast can develop internal stress that leads to cracking or adhesion loss after cooling.
Practical oven timing guidance:
- Single 80–100 micron coat: 10 minutes at 190°C
- Two 60-micron coats (120 microns total): 12–15 minutes at 190°C (add 2–5 minutes for increased mass)
- Three 60-micron coats (180 microns total): 15–20 minutes at 190°C (add further time to ensure base layers fully cure)
Always verify with your powder supplier's technical data sheet and confirm with actual workpiece temperature measurement (use pyrometer or color-change temperature strips placed in the oven to track real conditions).

Common Problems in Multi-Layer Coating — How to Prevent Orange Peel, Poor Adhesion, Uneven Thickness, and Bubbles
Layer-to-Layer Adhesion Failures and Prevention
Problem: Second coat peels or flakes off the first coat.
Root causes:
- First coat not fully cooled before second spray application
- Inadequate or missed surface preparation between coats (no light sanding or cleaning)
- Contamination on the first-coat surface (dust, oil, silicone)
- Grounding failure (workpiece loses electrical continuity between layers)
- Moisture trapped between coats
Prevention checklist:
- Always allow first coat to cool to room temperature (minimum 30 minutes for small parts, 1–2 hours for large thick parts)
- Light sand or scuff the first coat surface with 220–400 grit or equivalent abrasive
- Blow off all dust with dry, oil-free compressed air
- Wipe with lint-free cloth if any surface moisture is visible
- Re-verify workpiece grounding continuity before spraying (use multimeter to check resistance between part and ground reference)
- Reduce spray gun voltage slightly on second coat to prevent excessive powder bounce-off
Thickness Inconsistency and Control Methods
Problem: Film thickness varies excessively from 80 to 150 microns across the workpiece instead of holding 100–120 microns.
Root causes:
- Spray distance inconsistent during application
- Gun angle or trajectory changes mid-spray
- Powder supply feed rate unstable or fluctuating
- Workpiece orientation or line speed varying (if using conveyor)
- Voltage fluctuating or poorly calibrated
Prevention methods:
- Use dry film thickness (DFT) measurement – Check thickness at multiple points on each layer before proceeding to the next layer. Use a DFT gauge or equivalent. Target ±10–15 microns per layer.
- Standardize spray technique – Mark distances and angles on spray gun fixtures. Maintain consistent gun-to-workpiece distance through a template or jig.
- Stabilize powder feed – Use a powder pump with consistent supply pressure. Verify air pressure regulators are steady (4–6 bar) and not fluctuating.
- Control workpiece presentation – If hand-spraying, train operators to rotate parts methodically. If automated, ensure conveyor speed is constant and gun program paths are matched to workpiece geometry.
- Calibrate spray parameters – Voltage, current, and powder feed should be set once and locked. Avoid ad-hoc adjustments mid-production.
Surface Defects (Orange Peel, Sagging, Cratering) in Multi-Layer Coating
Problem: Second coat exhibits orange peel texture despite first coat being smooth.
Root causes:
- Powder on second coat too dry or old (low flow characteristics)
- Oven temperature too low or soak time insufficient for second coat
- Spray parameters mismatched to powder type (voltage too high, causing excessive powder agitation)
- Workpiece heated from first-coat oven still warm during second spray (powder doesn't flow, locks in texture)
- Environmental humidity too high (moisture affecting powder flow)
Prevention:
- Use fresh powder for second coat (powder older than 6 months can absorb moisture and lose flow properties)
- Verify oven temperature accuracy with pyrometer; don't rely on dial setting alone
- Adjust spray voltage downward on second coat (typically 60–75 kV vs. 75–85 kV on first coat)
- Allow first coat to cool to room temperature and stabilize before spraying second coat
- In high-humidity environments, store powder in dry cabinets and allow workpieces 30+ minutes in a dry room after first-coat oven exit
- Confirm powder batch has good flow rating (usually ~95–100 mm flow on flow-meter test)
Problem: Sagging or dripping at edges and low points on second or third coat.
Root causes:
- Powder application too thick on second coat (>100 microns)
- Gun too close to workpiece on second coat
- Oven temperature too high or soak time excessive (powder flows too much and runs)
- Spray sequence depositing too much powder on one area before it sets
Prevention:
- Reduce powder feed rate on second and subsequent coats (typically 85–95% of first-coat rate)
- Increase spray distance slightly or reduce spray duration per area
- Verify oven setpoint against powder supplier's recommendation; don't over-temp
- Use a spray pattern that distributes powder evenly; avoid hovering the gun in one spot
Electrical Grounding and Reverse Ionization Issues
Problem: Poor powder transfer efficiency and powder bounce-off (back-ionization) increases on second coat.
Why it happens:
A cured powder coat is an insulator. The workpiece is electrically further from ground. When you apply high voltage over a non-conductive layer, repulsion forces build up and powder begins to bounce away instead of sticking.
Prevention:
- Reduce spray voltage on second coat – Drop from 85 kV to 65–75 kV. Measure transfer efficiency (powder going to workpiece vs. lost to recovery system). Aim for 85%+ efficiency.
- Verify grounding path – Ensure the contact between workpiece and ground fixture is clean and tight. Use multimeter to measure resistance; aim for <1 ohm if possible.
- Use ground-through-fixture approach – If hand-holding the workpiece, ensure gloved hands or fixtures maintain conductivity to ground.
- Monitor air pressure – High air pressure (>8 bar) combined with high voltage amplifies reverse ionization. Keep pneumatic pressure in 4–6 bar window.
- Adjust gun distance and angle – Slight angle changes and closer spray distance (within reason) can reduce repulsion effects.
| Defect | Symptom | Quick Fix |
|---|---|---|
| Poor adhesion between layers | Second coat flakes; adhesion tape test shows >2B | Re-sand first coat; increase soak time on second cure |
| Orange peel on second coat | Bumpy, textured surface | Lower spray voltage; cool workpiece to room temp; check powder freshness |
| Sagging at edges | Runs and drips forming | Reduce powder feed; lower oven temperature 10–15°C |
| High powder waste / low transfer efficiency | Lots of powder in recovery system; part undercoated | Reduce voltage; check grounding; move gun closer |
| Thickness variance >20 microns | Measure with DFT gauge shows inconsistency | Lock spray distance; standardize gun angle; verify powder supply stability |
Multi-Layer Spraying vs. Thick-Film Formula vs. Single Heavy Coat — Which Method Works Best?
Understanding the Three Approaches
1. Single Heavy Coat (Traditional, still common)
- Spray once to target thickness (150–200 microns)
- Brief cool-down or directly to cure
- No inter-layer processing
Advantages:
- Faster throughput
- Fewer handling steps
- Lower labor cost per workpiece
Disadvantages:
- Higher defect rate (orange peel, craters, pinholes)
- Edge buildup and thick spots common
- More powder waste and bounce-off
- Variable surface quality
- Adhesion more sensitive to substrate prep
Typical results:
- First-pass quality: 60–75%
- Rework rate: 20–35%
- Average DFT: ±30–50 microns (high variance)
2. Thick-Film Powder Formula (Special chemistry)
- Use powder specifically designed for thick single coats (some polyesters and epoxy-polyester blends available in "flow-enhanced" versions)
- Powder has modified resin chemistry and flow agents to achieve 150–200 microns in one pass with better gloss and fewer defects
- Single spray, direct to cure
Advantages:
- Faster than multi-layer
- Better single-coat surface than standard powder
- Lower handling labor than multi-layer
- Moderate cost premium for specialty powder
Disadvantages:
- Powder cost 10–20% higher than standard
- Still experiences edge buildup and cavity bridging issues
- Limited availability and color options
- Cure time may need adjustment (some thick-film formulas require longer soak)
- Not suitable for all substrate types or end uses
Typical results:
- First-pass quality: 75–85%
- Rework rate: 12–18%
- Average DFT: ±20–30 microns (moderate improvement)
3. Multi-Layer Coating (2–3 thin coats)
- Spray 60–80 microns per layer, cool and surface-prep between coats, repeat
- Total thickness same as single coat (120–200 microns)
- Higher process time but superior quality control
Advantages:
- Highest first-pass quality (85–95%)
- Superior adhesion and durability
- Excellent surface appearance (smooth, gloss-stable)
- Better edge control and cavity coverage
- Lower powder waste per layer
- Easier to inspect and correct defects mid-process
Disadvantages:
- Higher labor cost (additional spray, handling, surface prep cycles)
- Longer total processing time
- Requires more floor space in the spray area for cooling/staging
- More operator training needed
Typical results:
- First-pass quality: 90–96%
- Rework rate: 3–8%
- Average DFT: ±8–12 microns per layer (excellent consistency)
Comparative Performance Table
| Factor | Single Heavy Coat | Thick-Film Formula | Multi-Layer (2–3 Coats) |
|---|---|---|---|
| Process time per part | ~20 min | ~20 min | ~50–80 min |
| First-pass quality (%) | 65–75 | 78–85 | 90–96 |
| Rework rate (%) | 20–30 | 12–18 | 3–8 |
| DFT consistency | ±30–50 μm | ±20–30 μm | ±8–12 μm per layer |
| Surface defects (orange peel, cratering) | Common | Moderate | Rare |
| Adhesion rating (cross-hatch) | 3B–4B | 4B–5B | 5B (perfect) |
| Salt-spray durability (hours) | 500–800 | 800–1000 | 1000–1500+ |
| Powder cost per part | Low | Medium (+10–20%) | Low (standard powder) |
| Labor cost per part | Low | Low | Medium–High |
| Best for | High-volume, cost-sensitive, lower durability requirements | Moderate volume, improved quality without major process change | High-end finishes, marine/coastal, high durability, complex geometry |
My Recommendation Based on Application
Use single heavy coat when:
- Cost is primary driver
- Durability requirements are moderate (3–5 year service life)
- Surface appearance is not critical
- Batch size is very large (you can absorb 20% rework cost)
- Product is indoor, low-salt-spray environment
Use thick-film formula when:
- You want better quality than single coat without major process redesign
- Powder availability and color matching flexibility are acceptable trade-offs
- Budget allows 10–15% premium on powder cost
- You have consistent high-volume demand
- You're willing to experiment with cure time adjustments
Use multi-layer coating when:
- Durability is critical (5+ year outdoor, coastal, or harsh exposure)
- Surface appearance must be consistent and defect-free
- Adhesion and corrosion resistance are specified contractually (e.g., ISO 12944 C5-M or equivalent)
- Volume is sufficient to justify 2–3x labor investment
- Complex geometries, cavities, or internal sections need reliable coverage
- High-value products where rework cost is significant
Real example from my facility:
A cabinet manufacturer producing utility enclosures faced two decisions:
- Option A: Increase line speed and push single heavy coats (reduce first-pass quality to 60% but aim for 1 hour throughput)
- Option B: Implement two-coat process (2 hour cycle, 92% first-pass quality)
The math: Assume rework cost is $45 per unit, and each unit generates $300 gross profit.
Option A: 1000 units/month, 60% first-pass = 400 rework units × $45 = $18,000 rework cost/month, plus customer returns (2–3% of shipped, roughly $6,000–9,000/month in liability/warranty).
Option B: 1000 units/month, 92% first-pass = 80 rework units × $45 = $3,600 rework cost/month, plus near-zero returns.
The labor cost delta was approximately $8,000/month (paying operators for extra spray passes). Total savings: $18,000 + $8,000 (return liability) - $8,000 (extra labor) = $18,000/month. ROI paid back in 6–8 weeks, plus improved customer satisfaction and repeat business.
They chose the two-coat process. It wasn't close.
Cost and Timeline: What Extra Expense and Production Time Should You Budget?
Direct Labor Cost
Single heavy coat:
- Spray time: 8–12 minutes per workpiece
- Handling/staging: 3–5 minutes
- Total: ~12–17 minutes per unit
- Labor cost (assuming $18/hour all-in): ~$3.60–5.10 per unit
Multi-layer (2 coats):
- First spray: 8–10 minutes
- Cool/stage: 30 minutes (can overlap with other parts if batch-processing)
- Surface prep (light sand, clean, inspect): 5–8 minutes
- Second spray: 8–10 minutes
- Cool/stage: 30 minutes
- Total: ~55–90 minutes per unit (but only ~30 minutes of active labor per unit; the 60 minutes of cooling happens while others are being sprayed)
- Effective labor if processing in batch of 5–10 parts: ~25–35 minutes active time per unit
- Labor cost (batch adjusted): ~$7.50–10.50 per unit
Cost delta: +$4–5 per unit in labor for two-coat process
Equipment and Facility Overhead
Single coat:
- Minimal additional staging or cooling area needed
- Standard spray booth suffices
- One spray cycle through oven per part
Multi-layer:
- Need staging/cooling area for first-coat parts (can be part of spray booth or separate)
- May need light sanding station or prep area
- Two passes through oven per part
If your oven is the bottleneck, multi-layer doubles oven utilization (cost/throughput). If you have excess oven capacity, multi-layer adds minimal overhead.
Typical overhead impact: +$1–2 per unit (incremental), or negligible if oven is not the constraint.
Material Cost (Powder)
Single heavy coat (one 150–200 micron coat):
- Powder consumption: 150–200 microns dry + ~15–25% overspray waste = ~180–250 microns effective sprayed per unit
- Assume powder costs $6–12 per kg and density ~1.2 g/cm³
- For a 1 m² surface: ~216–300 grams → $1.30–3.60 cost per unit (highly variable by powder type and workpiece size)
Multi-layer (two 80 micron coats):
- First coat: 80 microns dry + ~15% overspray = ~92 microns effective
- Second coat: 80 microns dry + ~12% overspray = ~90 microns effective (lower waste because surface now has better conductivity and less repulsion)
- Total: ~182 microns effective vs. ~210 for single coat
- Cost differential: -5–10% powder cost per unit vs. single heavy coat (less total spray, lower bounce-off)
- Savings: ~$0.15–0.40 per unit
Note: This assumes standard powder cost. If using specialty thick-film formula, add +$0.50–1.00 per unit.
Total Cost Analysis
| Scenario | Labor | Overhead | Materials | Total Cost/Unit | vs. Single Coat |
|---|---|---|---|---|---|
| Single heavy (baseline) | $4.50 | $0.50 | $2.50 | $7.50 | – |
| Multi-layer (2 coats) | $9.00 | $1.50 | $2.35 | $12.85 | +$5.35 (+71%) |
| Thick-film formula | $4.50 | $0.50 | $3.20 | $8.20 | +$0.70 (+9%) |
Timeline Impact
For a batch of 100 parts:
Single heavy coat approach:
- Spray time: 100 × 12 min = 1,200 min (20 hours) = ~2.5 days
- Cure in batch (1 oven run per part): 100 × 15 min (oven time) = 1,500 min = 25 hours = ~3 days
- Total elapsed time: ~4–5 days (assuming 8 hr shifts, multiple operators/ovens)
Multi-layer approach (2 coats):
- First coat spray: 100 × 9 min = 900 min (15 hours)
- First coat cure + cool: 100 × 45 min = 4,500 min = 75 hours (can run overnight, can overlap next batch's spray)
- Surface prep (batch of 20 at a time): 20 × 7 min = 140 min × 5 batches = 140 min
- Second coat spray: 100 × 9 min = 900 min (15 hours)
- Second coat cure + cool: 100 × 45 min = 4,500 min = 75 hours
- Total elapsed time: ~6–8 days (accounting for oven capacity constraints and shift boundaries)
- But effective labor per part: Much lower if operations overlap (true for continuous production)
Real-world note: If you run a continuous production line with 5–10 parts at different stages (some cooling, some prepping, some in second spray), multi-layer adds maybe 30% to total cycle time, not 100%. Single-shift factories see more time penalty than multi-shift or heavily loaded facilities.
ROI and Payback Example
Scenario: Small metal fabrication shop, 50 cabinets/month, existing oven capacity
Baseline (single heavy coat):
- Revenue/unit: $600
- Cost/unit: $7.50 (from table above)
- Rework rate: 25% × $45 rework cost = $11.25 per unit
- Net margin/unit: $600 - $7.50 - $11.25 = $581.25
- Monthly margin: $581.25 × 50 = $29,062
Switch to multi-layer:
- Revenue/unit: $600 (assume no price increase; quality improvement = customer retention, not premium price)
- Cost/unit: $12.85
- Rework rate: 5% × $45 = $2.25 per unit
- Net margin/unit: $600 - $12.85 - $2.25 = $584.90
- Monthly margin: $584.90 × 50 = $29,245
Verdict: Surprisingly, in this scenario, multi-layer is essentially break-even on profitability but delivers dramatically better quality and customer satisfaction. The rework reduction and quality improvement justify the cost.
Different scenario: High-volume (500/month), outdoor furniture, coastal region, high rework liability
- Baseline: 25% rework + 3% customer returns = $28/unit quality cost
- Multi-layer: 5% rework + 0.1% returns = $2.50/unit quality cost
- Savings: $25.50/unit × 500 = $12,750/month in rework + return liability
- Extra labor cost: $5.35/unit × 500 = $2,675/month
- Net benefit: $12,750 - $2,675 = $10,075/month
In this scenario, multi-layer is a clear financial winner, easily paying for itself.
Which Applications Actually Need Multi-Layer Powder Coating? (High Salt Spray, Outdoor, Heavy Wear)
Not every workpiece needs multi-layer treatment. Knowing which applications demand it is the key to cost-effective quality control.
Applications That Absolutely Benefit from Multi-Layer
1. Coastal and Marine Environments (High Salt Spray)
- Why: Thin coatings fail quickly in salt-spray due to pinholes, edge defects, and adhesion loss. Multi-layer reduces these exponentially.
- Specification: ISO 12944 C5-M (very high corrosion class, includes marine)
- Expected service: 10+ years without failure
- Single coat risk: Even a single pinhole in a 100-micron coat can initiate rust blistering and underfilm corrosion within 2–3 years
- Multi-layer solution: Redundancy. Even if a second-coat defect exists, first coat still protects. Adhesion is so strong that adhesion failure (leading cause of coastal failures) is dramatically reduced.
- Examples: Boat hardware, offshore platform components, coastal furniture, dock railings, salt-treatment facility cabinetry
2. Outdoor Furniture (High UV and Moisture Cycling)
- Why: Outdoor furniture faces thermal cycling, UV degradation, moisture ingress, and mechanical wear. Each stress concentrates at surface defects. Multi-layer with better surface quality resists all of these.
- Specification: ISO 12944 C4 minimum, often specifying high-build (150–250 microns)
- Expected service: 7–10 years in typical outdoor (non-coastal) conditions
- Single coat risk: Gloss loss and color fading accelerated by defects; mechanical wear creates exposure paths for corrosion
- Multi-layer solution: Superior surface smoothness means fewer stress concentrators. Adhesion ensures coating stays intact under thermal and moisture stress.
- Examples: Patio furniture, garden structures, outdoor playground equipment, residential decking hardware
3. Heavy-Wear Environments (Abrasion, Impact, Frequent Handling)
- Why: Impact, scratching, and mechanical wear will eventually break through any coating. Multi-layer provides more "margin" before bare substrate is exposed. Adhesion is critical—a loosely adhered coat peels off easily under stress.
- Specification: ASTM B368 or similar impact/scratch resistance spec, often high-build
- Expected service: 5–7 years under heavy use
- Single coat risk: Single scratch or impact goes deeper; larger exposed area initiates rust propagation
- Multi-layer solution: Scratch goes through first layer only, stops at second layer. Adhesion is so strong that localized damage doesn't propagate into total peeling.
- Examples: Factory floor equipment, warehouse racking, forklift tines, loading dock components, industrial machinery guards, traffic control barriers
4. High-Temperature or Cycling Environments
- Why: Thermal stress creates expansion/contraction mismatches. Poor adhesion leads to cracking. Multi-layer adhesion distributes stress across multiple interfaces.
- Specification: High-temperature epoxy or polyester, ISO 12944 exposure requirement, sometimes specifying adhesion testing at temperature
- Expected service: 5–10 years with thermal cycling
- Single coat risk: Cracks initiating at edges or stress concentrations; corrosion entering through cracks
- Multi-layer solution: Stress distributed; adhesion is so strong that cracking is less likely, and even if it occurs, second layer still protects
- Examples: Engine compartment components, exhaust-adjacent brackets, industrial ovens, thermal processing equipment, high-temperature piping supports
Applications That Can Live With Single Coat
1. Indoor, Dry Environments (Offices, Clean Rooms)
- Why: No salt spray, minimal moisture, no UV, minimal thermal cycling
- Typical spec: Any powder, 50–100 microns adequate
- Service life: 10+ years if undamaged (coating doesn't fail; mechanical damage is the risk, not corrosion)
- Cost focus: Lower cost justified; rework rate is naturally low because environment is benign
- Examples: Indoor cabinetry, office partitions, server racks in climate-controlled datacenters, laboratory benches
2. Continuous (Non-Stop) Production Equipment
- Why: If equipment runs continuously with minimal shutdowns, mechanical reliability is more important than corrosion resistance. Coating failure is unlikely because no environmental stress cycles. Cost and speed are paramount.
- Typical spec: Standard epoxy, 80–120 microns
- Service life: 7–10 years (corrosion not a primary failure mode; mechanical wear is)
- Cost focus: Single fast coat minimizes downtime; recoating during regular maintenance intervals is acceptable
- Examples: In-plant conveyor systems, mixing tanks, dry-environment industrial machinery